Green & Black Olive Focaccia
Aug 05, 2022, Updated Oct 15, 2024
Jump to RecipeThis post may contain affiliate links. Please see our disclosure policy.
This green and black olive no knead focaccia is my favourite way to eat bread! It’s made with lots of olives, a sprinkle of flaky sea salt and rosemary and a drizzle of olive oil to give it that golden brown exterior.

Green & Black Olive Focaccia
Sometimes I want to make something just for myself and this is one of those times. It’s hard to compete with my garlic confit focaccia however, stripping recipes back and not tinkering with the basics can work just as well.
I love a simple focaccia with nothing more than some green and black olives and fresh herbs scattered on top. With a crispy crust and soft and fluffy interior, this focaccia will be your new best bread friend!
My top tips for making the best focaccia
Leave the dough to rest and rise as long as you can – if you have the time, I recommend leaving it for 24 – 48 hours in as this will result in a fluffier and lighter dough. If you are short on time try and leave it for a minimum of 8 hours.
Leave your dough to rise in a big bowl with either a silicone lid or plastic wrap covering it. Your dough will double or even triple in size so it will need a lot of room to grow.
Use a high quality extra virgin olive oil and don’t be shy with it – this is a recipe that relies heavily on extra virgin olive oil not just for the taste but also for the texture and that golden and crunchy crust.
It’s important we are not skimping on the quality which is why I recommend using Rich Glen olive oil. If you are not a fan of adding the garlic confit, you can simply omit this from the recipe and use Rich Glens Wild Garlic Olive Oil or their signature extra virgin blend.
Find a warm spot in your house for the second rise – a room temperature environment will help the dough rise for its second rise. If you are making your focaccia in winter, a little trick I learnt is to leave the light on in your oven and let the focaccia dough rise in there.
Top tips cont…
Don’t be afraid to get creative – my favourite topping for focaccia is garlic confit and fresh rosemary however, these are only optional toppings! This can be kalamata olives, potatoes, onions, shallots or plain with some kosher salt and a tablespoon of olive oil.
Don’t be afraid to get creative and personalise it to your personal taste.
Use the right flour – while bread flour will leave you with a chewier texture, it can be a little hard to find! All purpose flour will work just as well!
It’s all about the baking sheet – I use a baking dish that is 34cm x 23cm x 5cm. You can also use a rimmed baking sheet so your focaccia doesn’t rise as high or a cake pan which will give the focaccia a circular and deep shape. It really comes down to personal preference!
Rise baby rise – if you’re using an active dry yeast, it needs to feed off honey in warm water. Leave it to sit in the bowl for 5 minutes or until bubbles start to form. This will indicate your yeast is alive.
Frequently Asked Questions
Can I leave my dough to rise for a shorter period of time?
There are recipes that allow the dough to rise in a short amount of time however, this recipe will not work unless you leave your dough to rise for a minimum of 8 hours for the first rise in the fridge and a minimum of 2 hours in a warm place for the second rise. I always recommend leaving it for as long as possible to get the best result.
What size baking tin do you use?
The baking tin I use is 34cm x 23cm x 5cm. It’s important your baking dish is large and deep enough for the focaccia to rise in.
Can I use an active yeast?
Absolutely! The yeast I use is a non active dry yeast which is why we need to activate and feed it with the honey. If you are using an active yeast you can skip this first step and simply add the yeast to your flour with your water and salt.
How long does the focaccia keep for?
Bread is always at its most delicious on the day it’s made. I recommend freezing the bread on the day it has been made to maintain its freshness for as long as possible. If not, you can use it for up to 3 days before it goes stale. But keep in mind, stale focaccia can be turned into the best golden brown breadcrumbs!
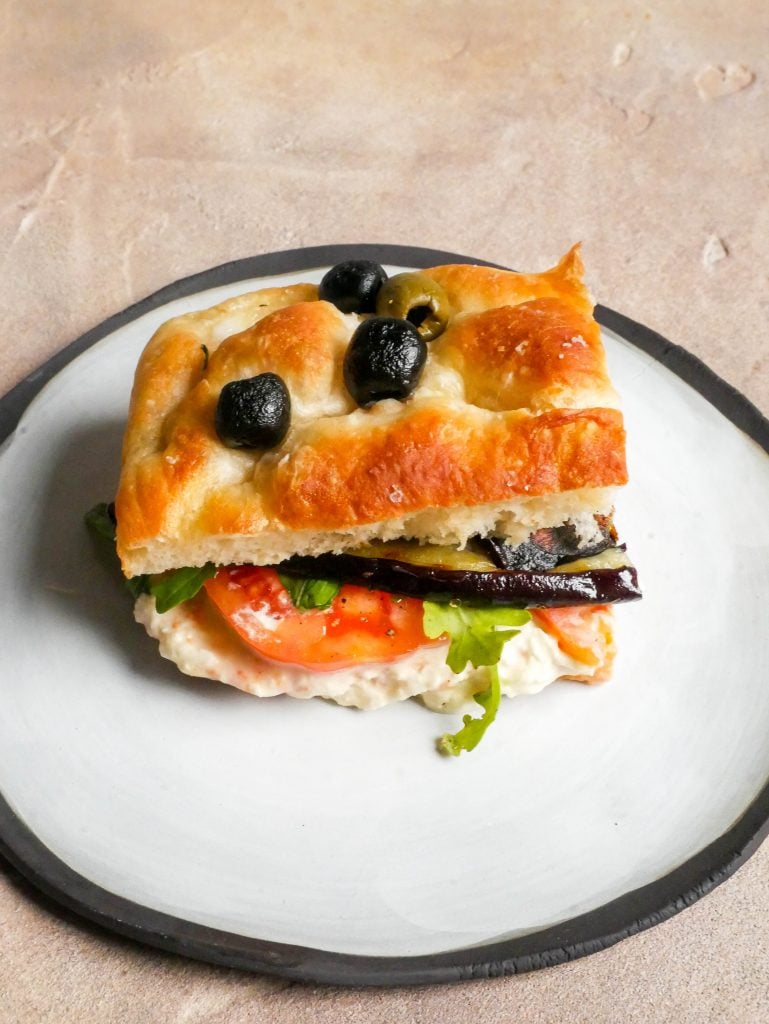
Find my garlic confit focaccia recipe here and vegetarian focaccia sandwich recipe here
If you make this recipe, please tag me on Instagram, Tik Tok or Pinterest so I can see your wonderful creations!
If you have any questions or would like to leave a review, please do so here! I always love answering your food and recipe related questions and hearing your feedback on my recipes.
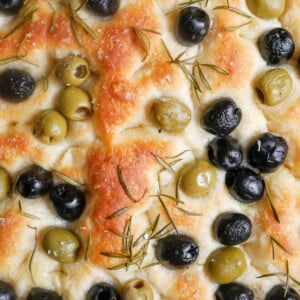
Green & Black Olive Focaccia
Ingredients
- 2.5 cups lukewarm water, 2 cups cold water + 1/2 cup boiling hot water (600ml)
- 1 sachet dry yeast, 7g
- 2 tsp honey or maple syrup
- 5 cups all purpose white flour, 740g
- 2.5 tsp flakey sea salt
- 200 g black and green olives, pitted
- 2 sprigs rosemary leaves
- 6 tbsp olive oil, Extra Virgin
Instructions
- In a medium bowl, mix together the lukewarm water, yeast and honey with a whisk and leave to sit for 5 minutes or until the yeast has foamed. This will indicate that your yeast is active.
- In a large bowl, combine the flour and salt and whisk together. Add the yeast mixture to the bowl and bring the dough together with your hands or a spatula until a shaggy and sticky dough forms.
- Coat a large mixing bowl with 4 tablespoons of olive oil and transfer the dough to the bowl. Coat the dough in the olive oil. Cover the bowl with plastic wrap and place into the fridge. Leave the dough to rise for a minimum of 6 hours but ideally for 24 hours. The dough will double in size and look bubbly.
- Take the dough out of the fridge and fold it over itself in quarters. Gather up each edge of the dough with your hands and fold it over itself while turning the bowl. The dough will deflate while you shape it into a neat ball.
- Coat a deep rectangular baking dish (I use a pan that is 34cm x 23cm x 5cm) with 1 tablespoon of olive oil and transfer the dough ball to the baking dish. Using your fingers, stretch the dough out slightly into a rough rectangular shape. There is no need to stretch the dough out to the edges of the pan as the dough will rise and spread. Cover the pan with a tea towel and leave the dough to rise in a warm area of your house for 3 - 4 hours. If your dough is uncovered there is risk of too much air getting into the dough and creating a dry and crusty layer on top.
- Preheat the oven to 200 degrees celsius. Once the dough has risen, use your fingers to indent or dimple the dough. Scatter the olives and rosemary over the dough. Drizzle the dough with 2 tablespoons of olive oil. This will help the crust of the dough get golden and crispy when baking. Finish off with a sprinkling of flakey sea salt. Bake for 20 - 30 minutes or until the dough has developed a golden crust on top.
- Let the bread slightly cool before removing it from the baking tray. Place onto a wire rack.
Video
 Like this? Leave a comment below!



I love your blog.. very nice colors & theme. Did you create this website
yourself or did you hire someone to do it for you? Plz answer back
as I’m looking to construct my own blog and would like
to find out where u got this from. appreciate it
Hey there! I’ve been following your weblog for a while now and finally got the courage to go ahead and give you a shout
out from New Caney Texas! Just wanted to mention keep
up the excellent job!
Wow. Just Wow!
woow first time making any bread types love your recipe easy to follow just have my dough in the fridge has risen beautifully cooking tomorrow 😀 thank you again
Thank you!
Hi there,
I make my own starter, how much of it I shall use so you think?
Came wait to try it thank you.
Excellent blog here! Also your site loads up fast!
What host are you using? Can I get your affiliate link
to your host? I wish my website loaded up as quickly as yours lol
My hubby and I finished your recipe last night. It was our first time baking any sort of bread together. While it looked BEAUTIFUL, it was near impossible to get out of the dish. I had to cut it out piece by piece once it cooled and couldn’t let it rest on a rack as you suggested. I ended up using (and ruining) my good filet knife to coax each piece out of the dish. I even used more oil than your recipe called for. I thought about using parchment next time. Any suggestions for the next attempt? I wish I could post a pic though, it looked SO tasty! My hubby did enjoy it… I enjoyed the texture since C-19 took my ability to taste anything.
I also had to cook it an extra 10 minutes- for close to 40 minutes which was perfect for us. Again, I am chalking that up to using a glass 9×13″ dish. I also realized I have not tested the temp of our oven, so that may be a contributing factor. I did buy an oven thermometer this evening to test the next time I use it. Of course, AFTER we made the bread I realized I had a metal pan… ugh.
Finally, maybe I missed it, but the recipe did not specify how much salt to use IN the making of the dough. I assumed 1 TSP of sea salt and that seemed adequate.
All that being said, we WILL be trying this again! We used cured black and green olives from our local Deli, and I sliced fresh garlic cloves to sprinkle over the top.
Thank you for making it such a fun 48 hours for us!
Oh no! That has happened to me before and it was because of the pan. I would line the pan with some baking paper and then you will not have an issue with sticking! Thanks for the feedback. I will add those cooking notes into the recipe.
You need to take part in a contest for one of the finest sites on the web.
I am going to highly recommend this blog!
Do you keep the oven set to 200 degrees for the entire 30 minute baking time?
This does not seem hot enough.
Yes, this is correct. That’s 200 C / 390 F
Hi Daen, love your recipes! Are you using canned olive or pickled olive? xx, Xinyi
Thank you! These are canned / jarred olives.