Garlic & Rosemary No Knead Focaccia

May 05, 2025
Jump to RecipeThis post may contain affiliate links. Please see our disclosure policy.
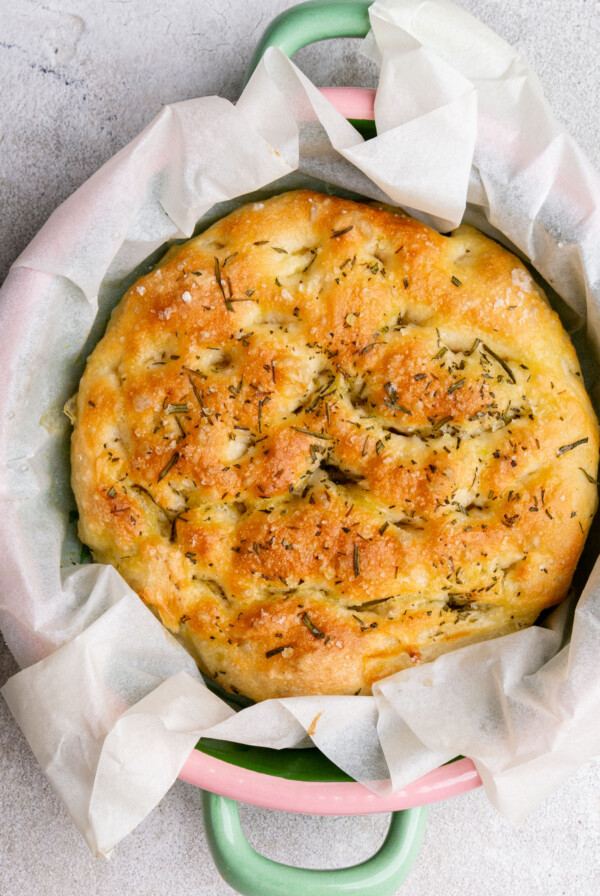
This garlic and rosemary no knead focaccia is made with my famous garlic confit, giving it rich, caramelised flavour in every bite. The dough is effortlessly mixed by hand (no kneading or prior bread making skills required) and bakes into a golden, fluffy loaf with crispy edges. Topped with rosemary and confit garlic, it’s the ultimate herby, garlicky bread.
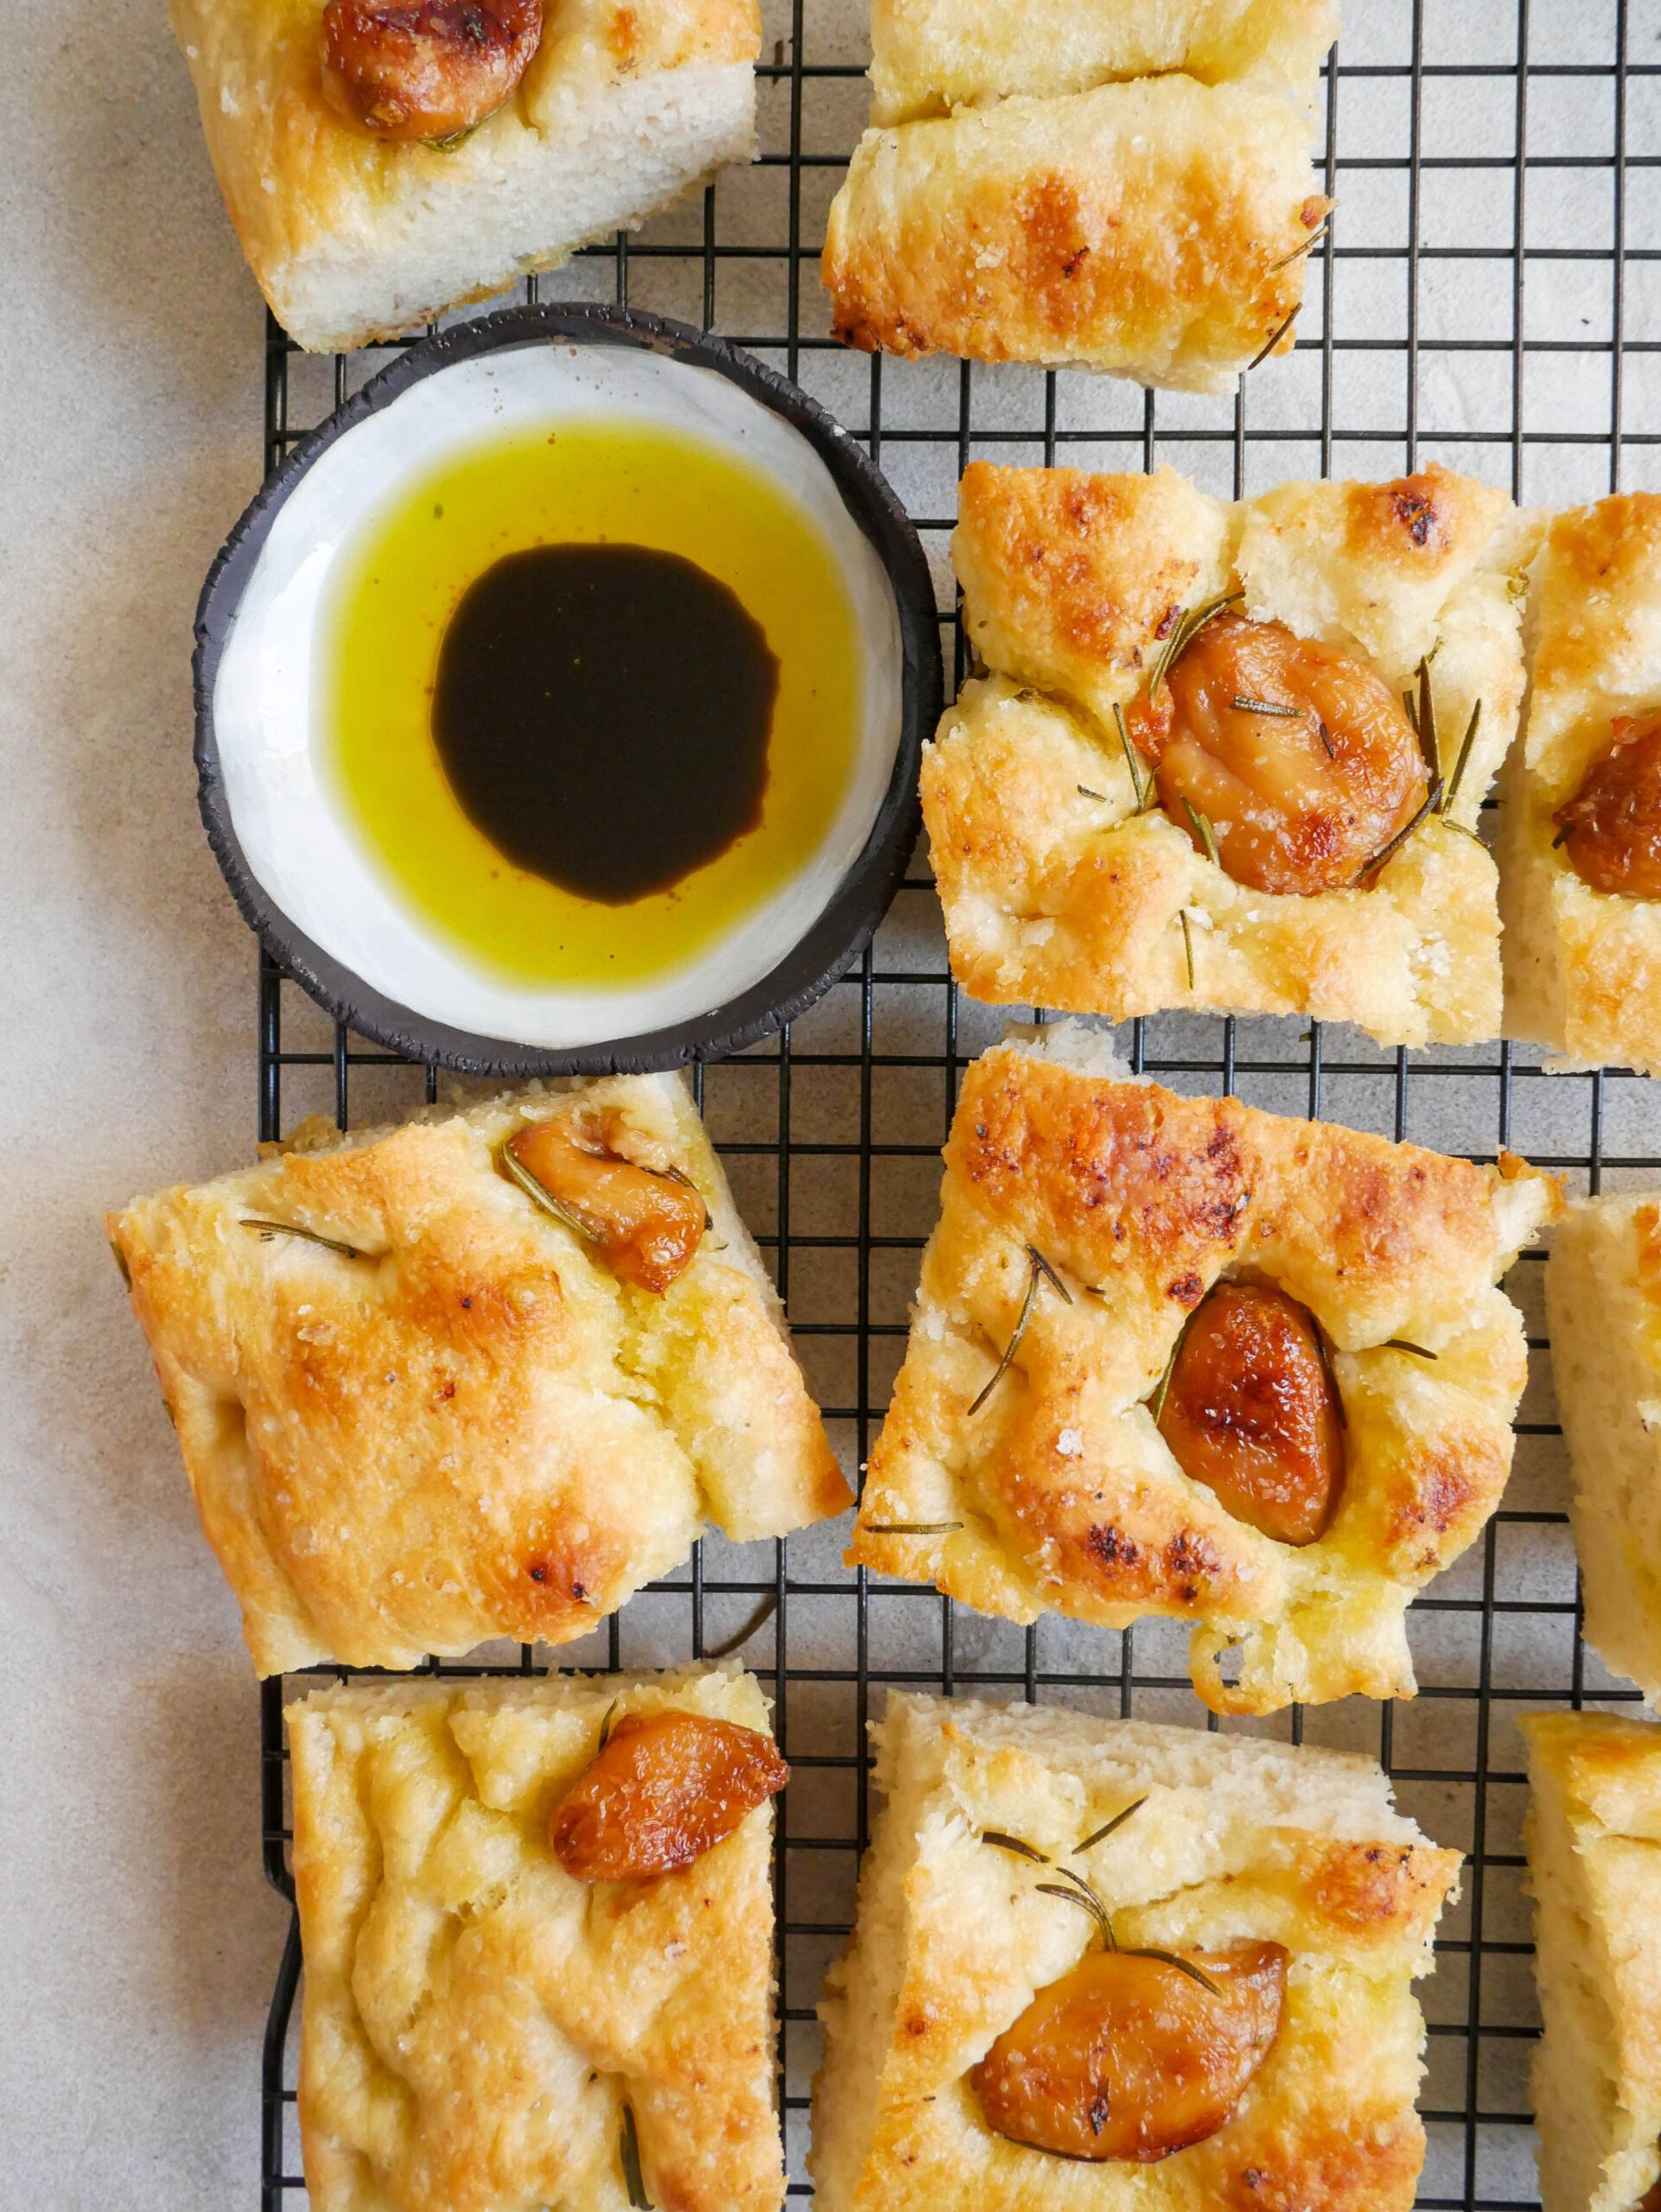
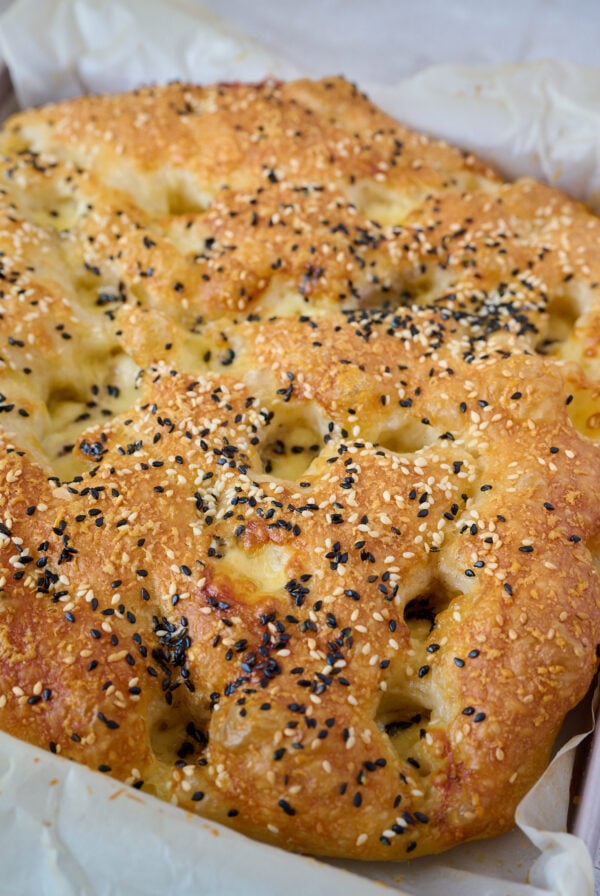
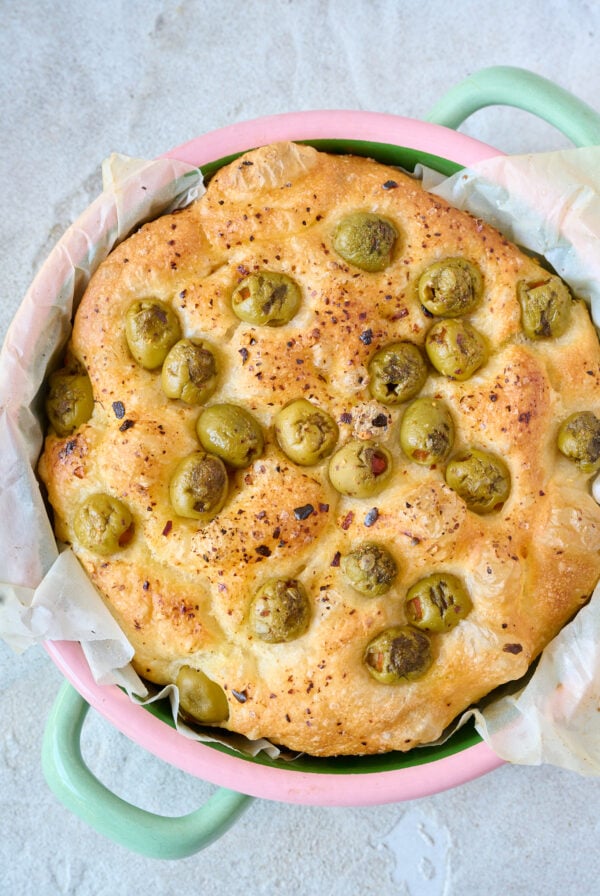
I love making focaccia and have so many different toppings for you to try! You will love my cheesy seeded focaccia, green olive focaccia and fig and goats cheese focaccia.
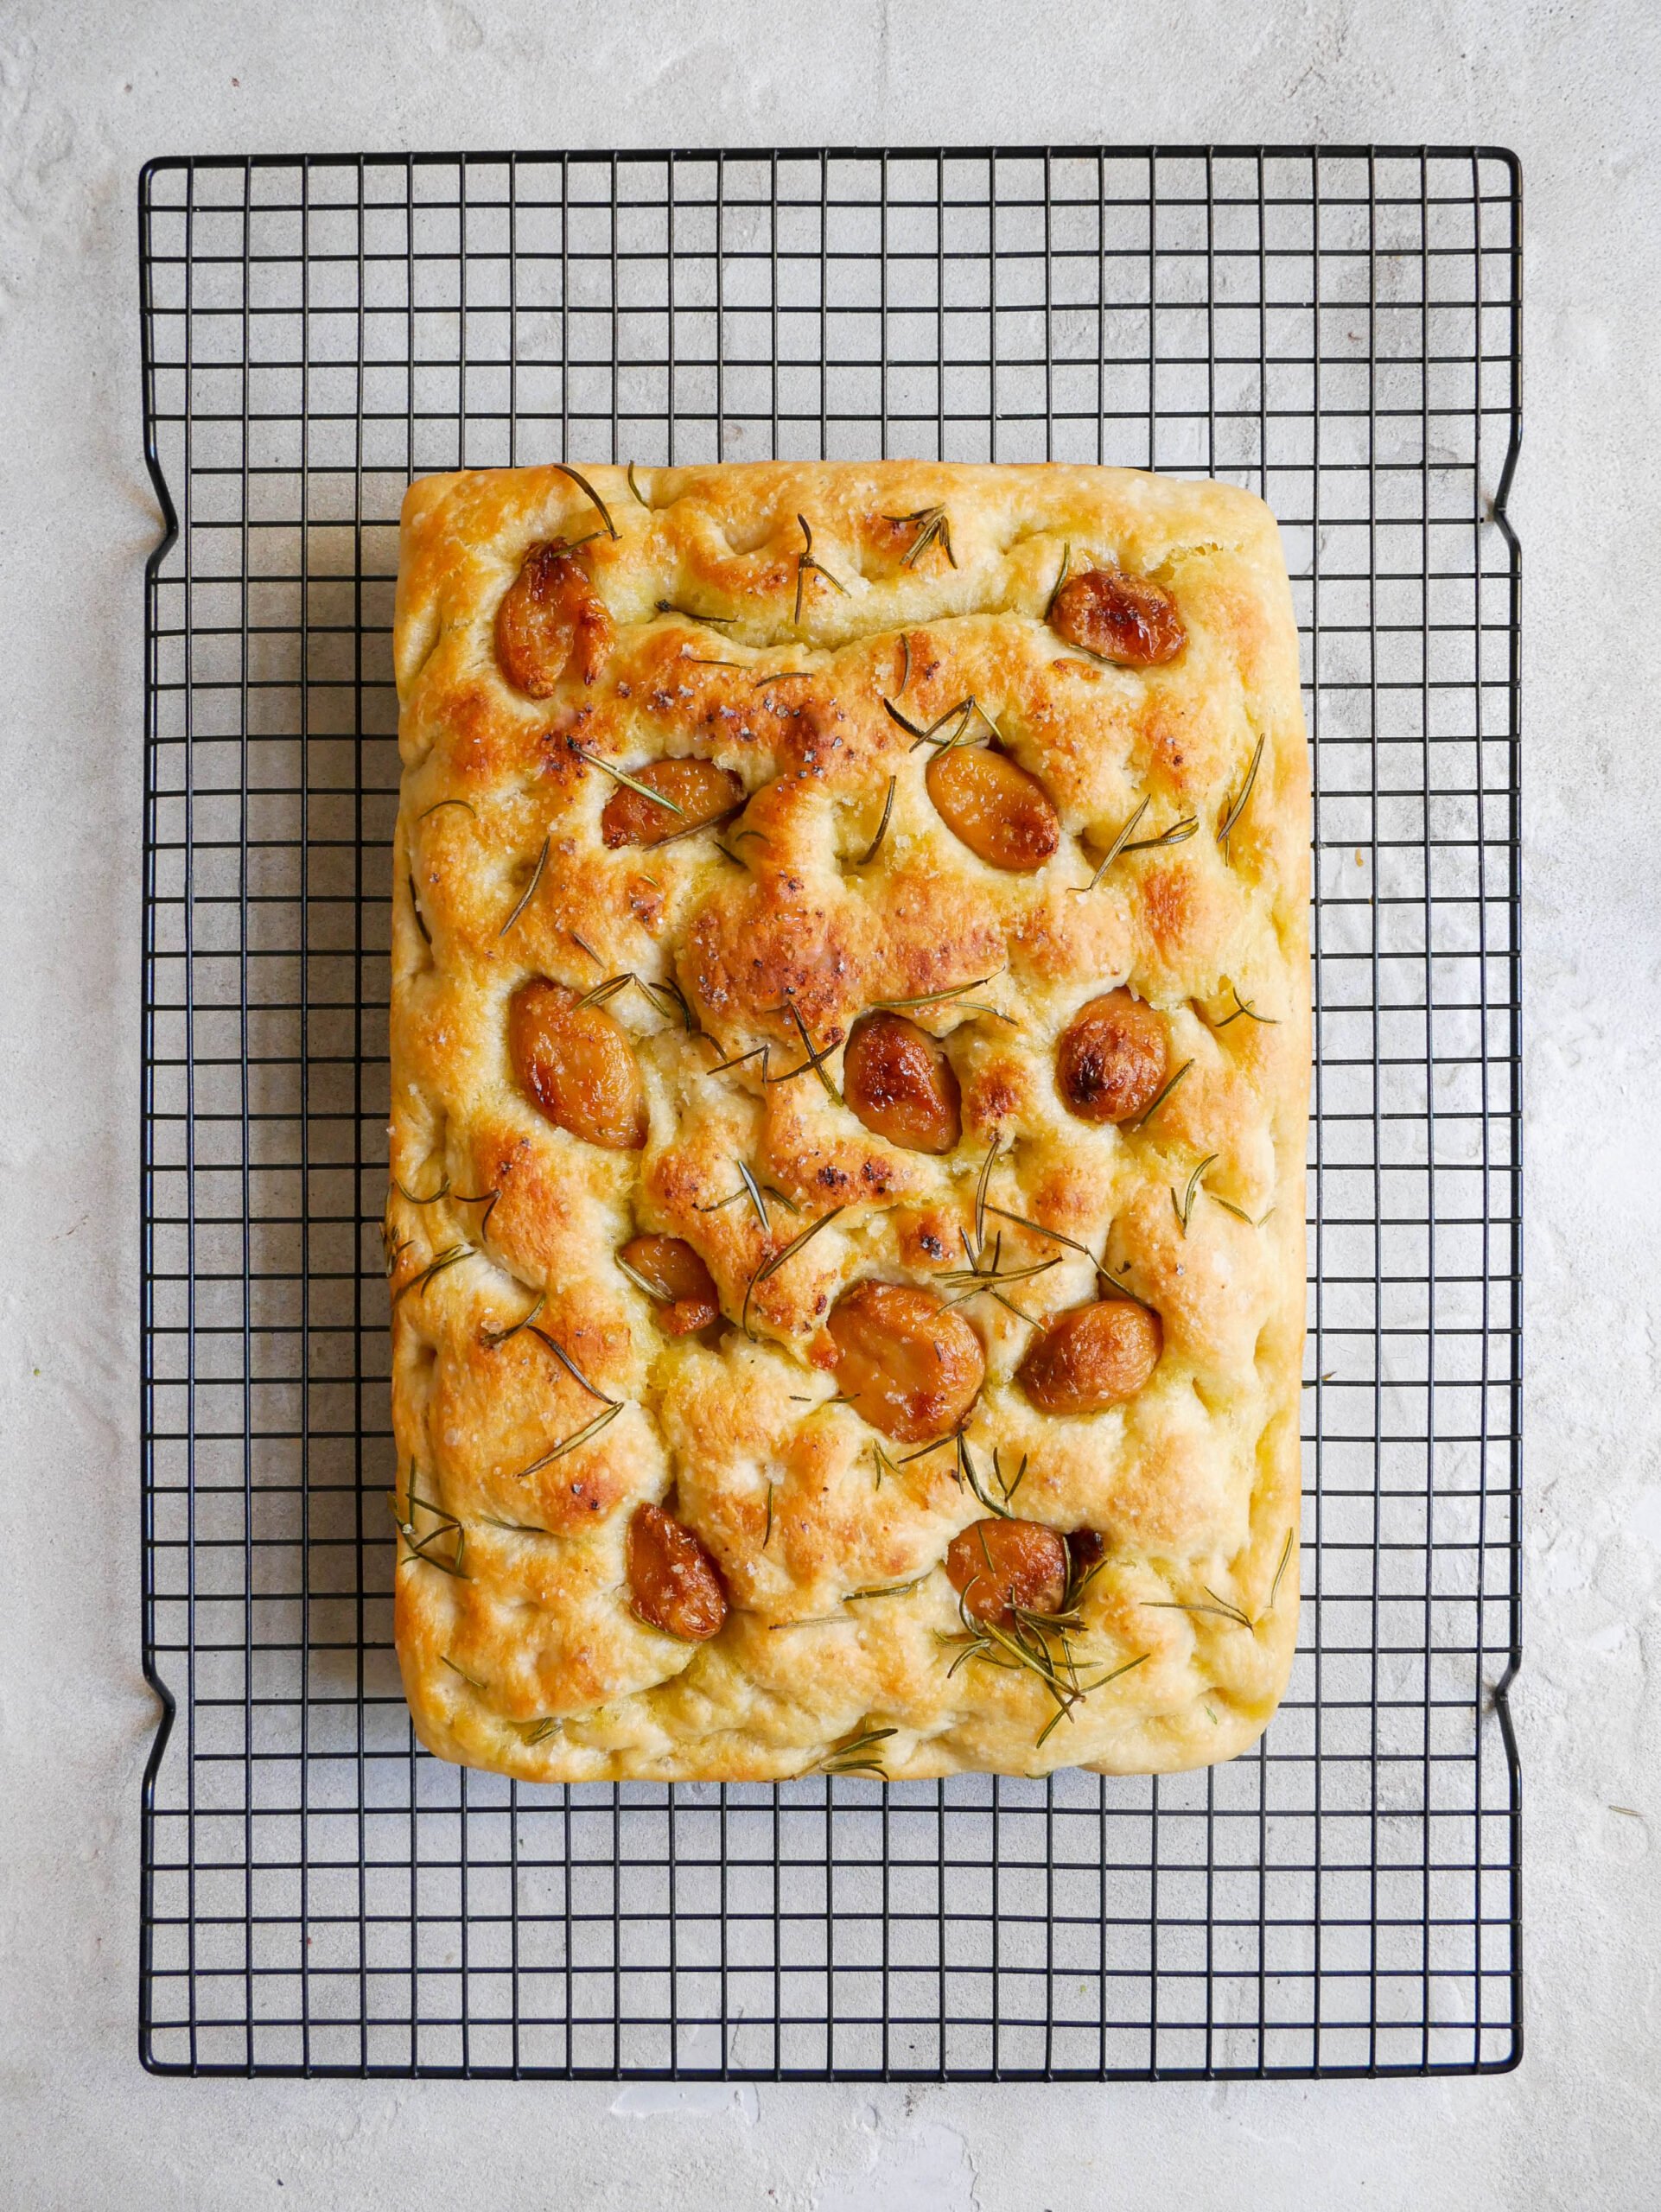
If there’s one bread recipe, or even just recipe, I’m known for, it’s focaccia. I make it so often that I’ve built a whole collection of toppings around my foolproof no knead dough—and this garlic and rosemary version might just be my favourite yet. Focaccia is an Italian style yeasted flatbread that is similar to pizza dough
Made with my famous garlic confit, this garlic and rosemary no knead focaccia is soft and pillowy on the inside, golden and crispy on the outside, and full of garlicky, herby flavour in every bite. The slow-roasted garlic confit melts right into the dough, forming golden, caramelised pockets on top, while fresh rosemary brings a fragrant, earthy finish. It’s a modern take on a traditional Italian rosemary focaccia. The best part? The dough comes together with your hands (or a wooden spoon if you don’t want to get messy!)
Whether you’re tearing off a piece to dip in olive oil or a creamy roasted red pepper dip, serving it with a big bowl of pasta, as a side to a delicious Italian appetizer or using it as the base for an epic sandwich, this focaccia is simple, satisfying, and always a crowd-pleaser.
Ingredients For The Dough
To make my no knead focaccia dough, you only need a few simple ingredients!
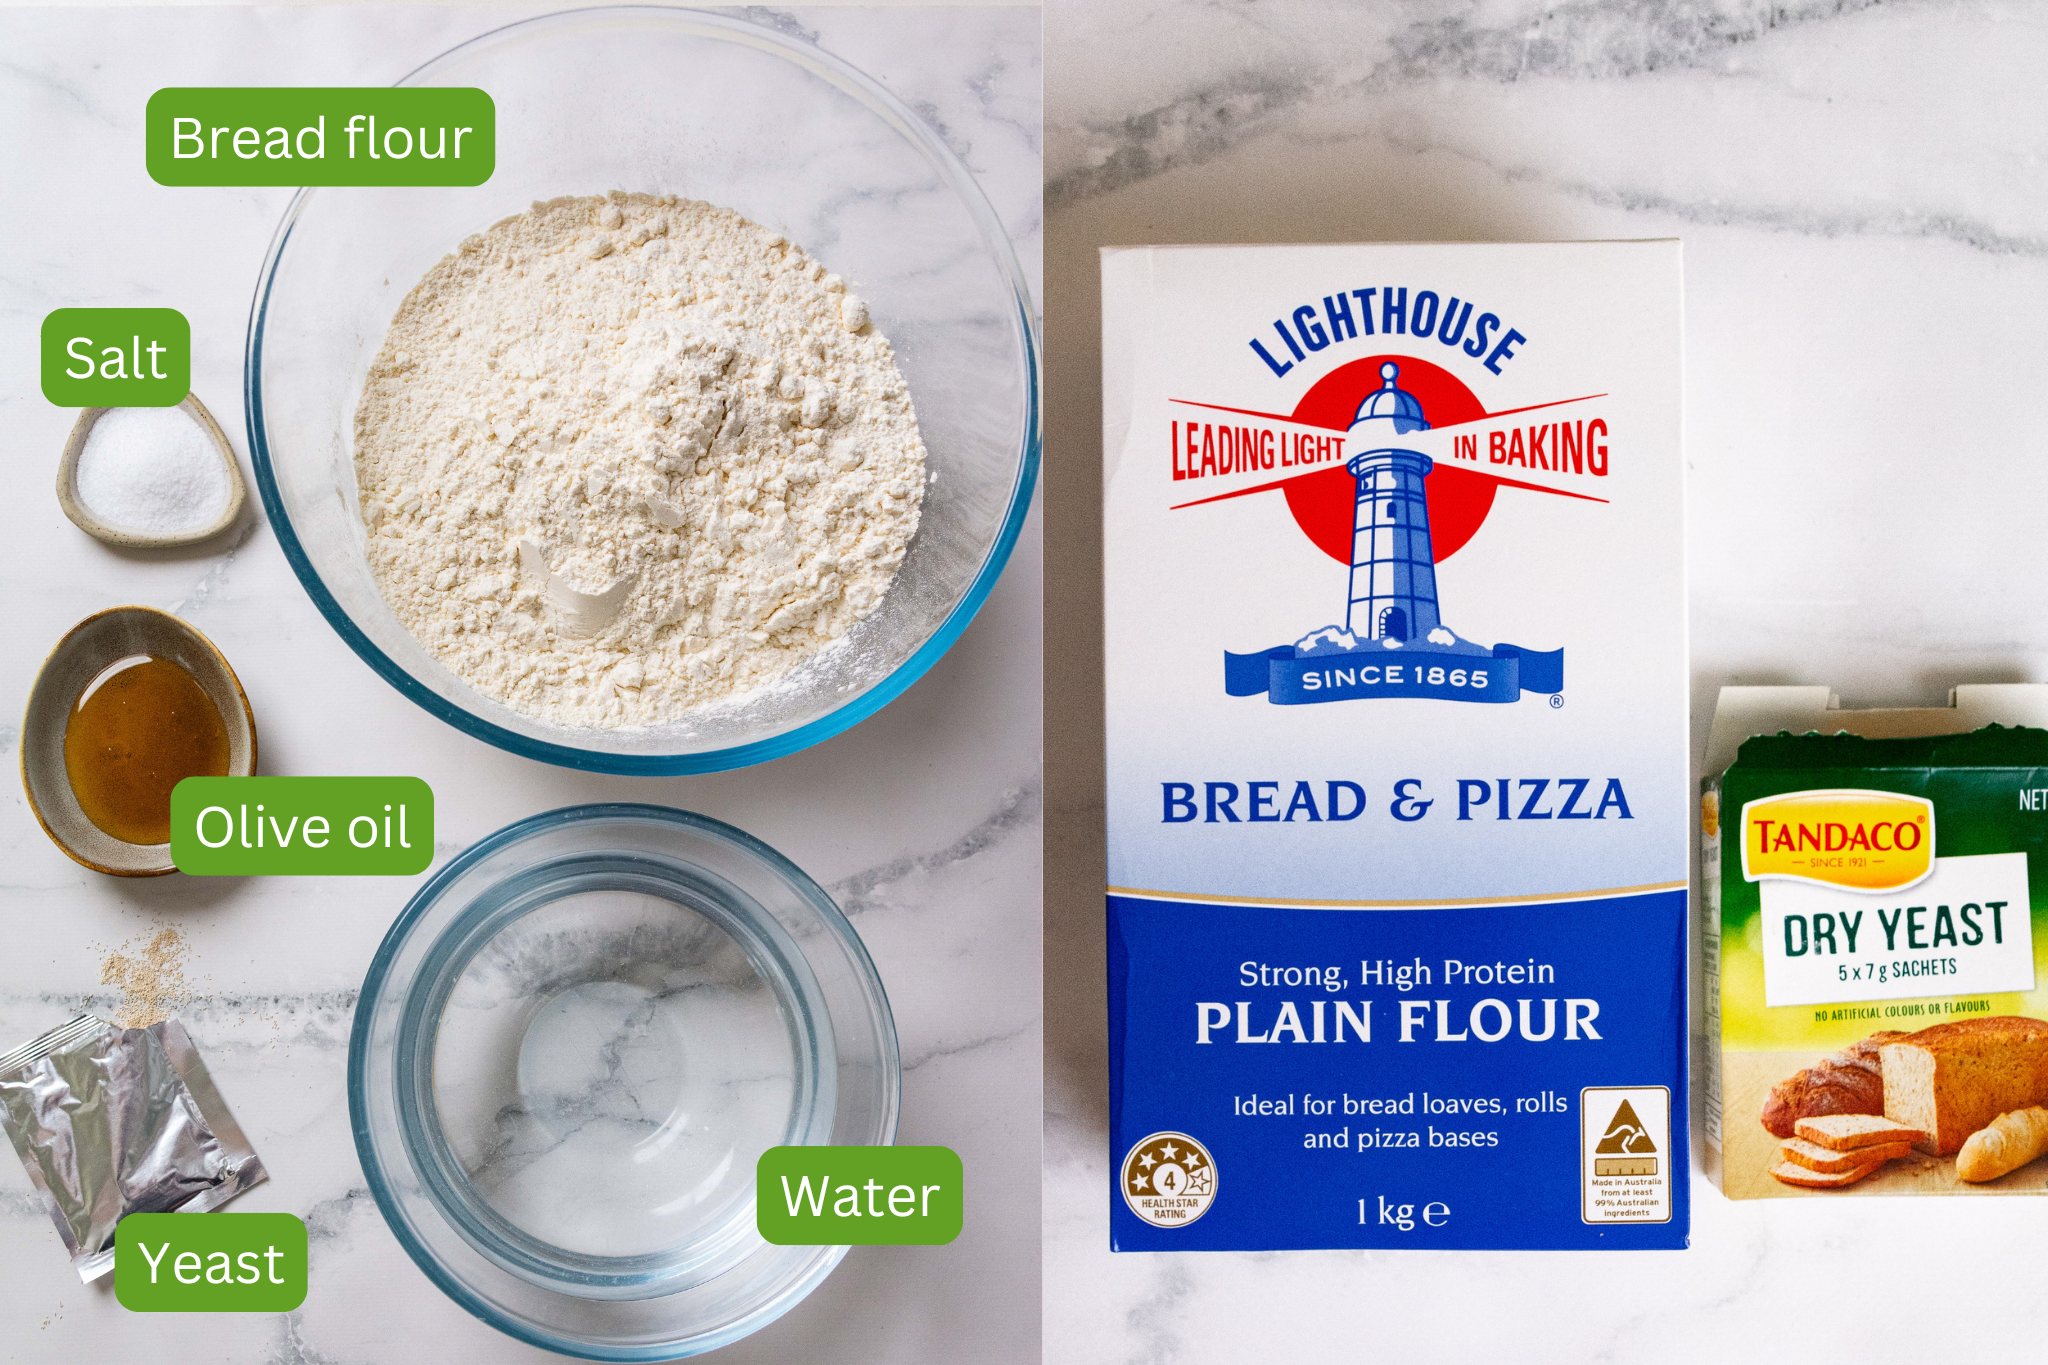
- Bread flour: I like to use bread flour over all purpose flour as it creates a softer and chewier bread. The brand I like to use is by Lighthouse. If you can’t get your hands on bread flour, all purpose regular flour will work just fine!
- Yeast: I always opt for a dry yeast which is a type of dehydrated yeast used in baking to help dough rise. It’s made up of dormant yeast cells that become active when mixed with warm water. The brand of dry yeast I like to use is by Tandaco as they come in conveniently sized 7g sachets. You could also use instant yeast! Just skip the step of adding the yeast to the water as instant yeast can be added straight to your flour.
- Salt: Fine kosher sea salt is best for when making doughs. Salt enhances the flavour of the dough and helps bring out the natural taste of the flour, olive oil, and toppings. It also strengthens the gluten structure and controls the yeast activity for a better rise and texture.
- Olive oil: Olive oil is the most important ingredient when making focaccia! It gives the bread its signature golden crust, rich flavour, and tender, pillowy texture. It’s used in the dough, the pan, and generously drizzled on top, helping the crust crisp up beautifully while keeping the inside soft and airy. Always use a high quality extra virgin olive oil when making focaccia!
A full ingredient list with exact amounts can be found in the recipe card below.
Expert Tips
Before we jump into how to make this delicious no knead focaccia dough, here are all my expert tips!
- Leave the dough to rest and rise as long as you can – if you have the time, I recommend leaving it for 24 – 48 hours (72 hours maximum) as this will result in a fluffier and lighter dough. If you are short on time try and leave it for a minimum of 8 hours.
- Use a high quality extra virgin olive oil and don’t be shy with it – this is a recipe that relies heavily on extra virgin olive oil not just for the taste but also for the texture and that golden and crunchy crust. It’s important we are not skimping on the quality which is why I recommend using a high quality extra virgin olive oil.
- Find a warm spot in your house for the second rise – a room temperature environment will help the dough rise for its second rise. If you are making your focaccia in winter, a little trick I learnt is to leave the light on in your oven and let the focaccia dough rise in there. Be sure not to overproof your dough which means leaving it in a warm spot for too long! If your dough is over proofed, the dough will deflate when dimpled however, it will still taste great!
- It’s all about the baking sheet – I use a baking dish that is 34cm x 23cm x 5cm. You can also use a rimmed baking sheet so your focaccia doesn’t rise as high. It really comes down to personal preference!
- This is a high hydrated dough! Focaccia can have a hydration of 100% which means we are working with a high water ratio. My focaccia recipe sits at 98% hydration. So while it may seem like the dough won’t come together because it is too wet, trust the process!! Keep mixing until a wet dough forms and watch the dough strengthen after every stretch and fold.
How To Make Garlic & Rosemary No Knead Focaccia
This garlic and rosemary no knead focaccia comes together with minimal effort—just mix the dough, let it rise, and bake until golden and crispy.
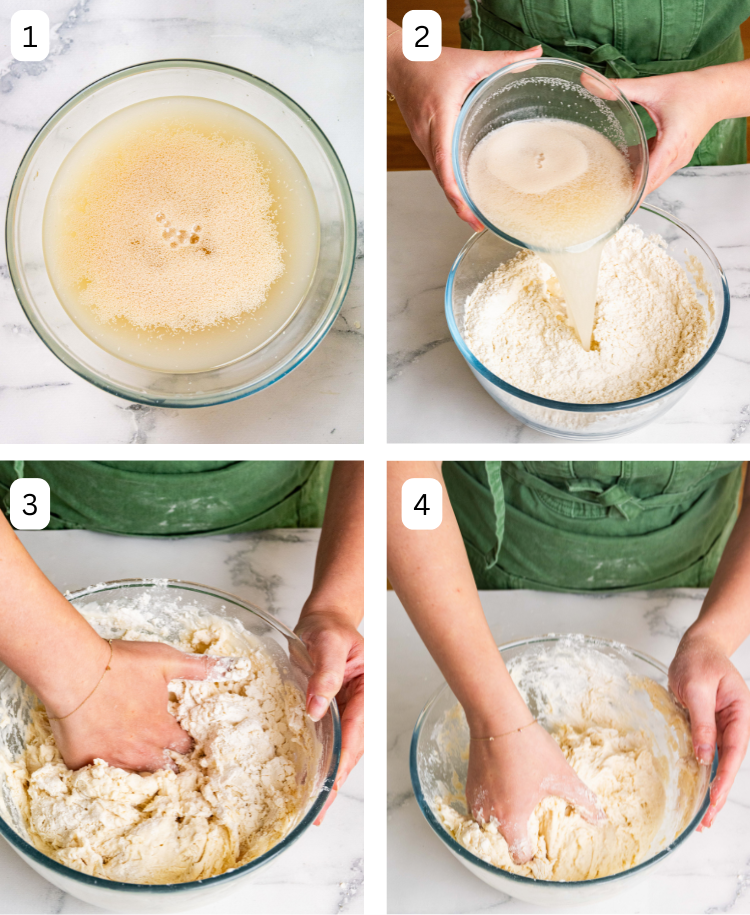
- Step 1: Begin by stirring lukewarm water, yeast, and honey in a medium bowl with a whisk. Wait for about 5 minutes until the mixture becomes frothy, signalling that the yeast is ready (image 1).
- Step 2: Whisk flour and salt. Then, pour in the yeast mixture (image 2).
- Step 3: Mix together the dry and wet ingredients with a spoon or your hands (image 3).
- Step 4: Continue to mix until you form a wet, sticky dough without dry spots. Cover the bowl with plastic or a damp cloth for 10 minutes. This dough has a very high hydration so it’s important the dough is left to rest for 10 minutes prior to the first stretch and fold (image 4).
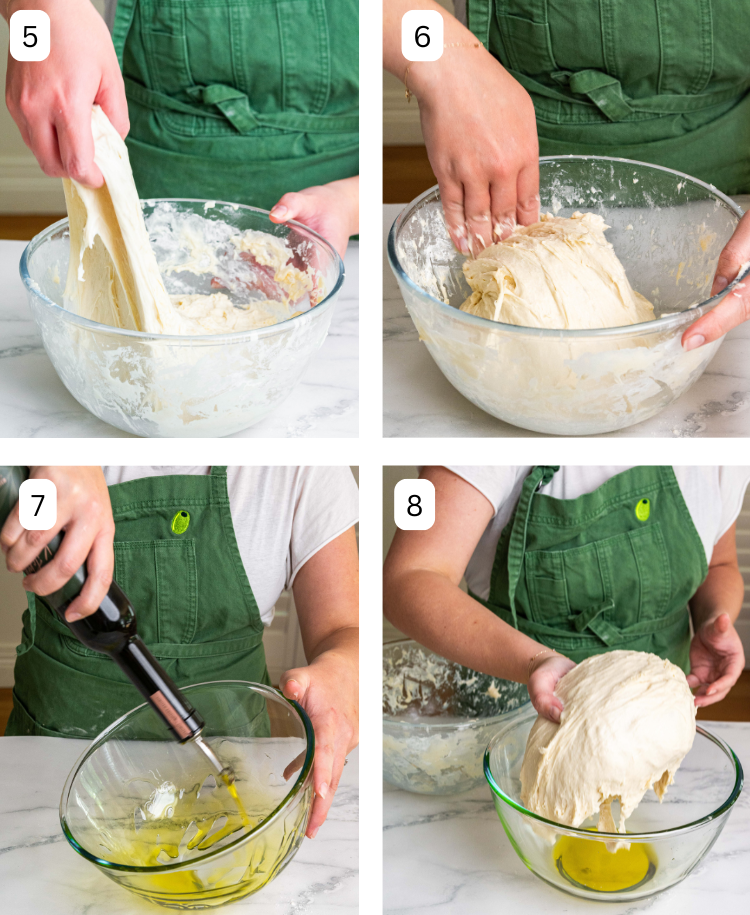
- Step 5: Afterward, with damp hands, stretch a piece of the dough and fold it across itself. Turn the bowl and repeat this action three more times or until a ball begins to form, covering the dough again for another 10 minutes (image 5).
- Step 6: Continue this stretching and folding process until the dough shapes into a ball (image 6).
- Step 7: Coat a new bowl with 20g of olive oil, place the dough inside (image 7 & 8) and cover it tightly with plastic. Let it rest in the fridge between 12 to 72 hours; this is the first proof.
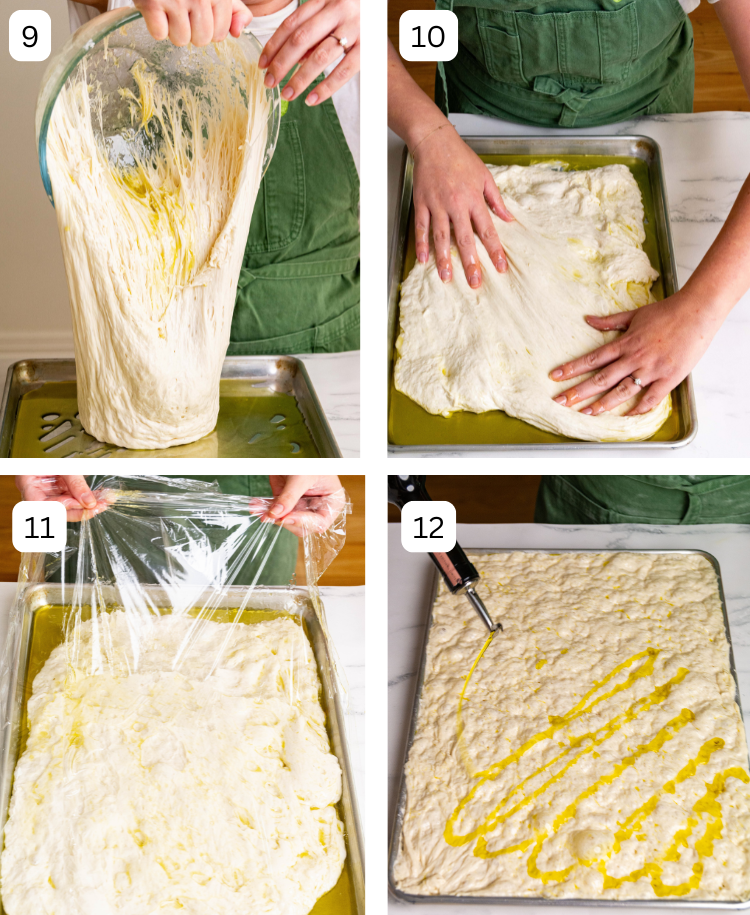
- Step 10: Oil a baking tin with another 20g of olive oil and transfer the dough to it. (image 9). Gently stretch the dough to a rough rectangle, but not to the tin’s edges—it will spread as it rises (image 10). Cover and let the dough rise for 2 hours in a warm spot or until it doubles in size.
- Step 11: Drizzle the dough with olive oil (image 11).

- Step 12: Dimple the dough with your fingers. It’s best to oil your hands to prevent them from sticking to the dough (image 13 & 14).
- Step 13: Top the dough with garlic confiT, rosemary and salt (image 15). Bake for 30 minutes at 400°F / 200°C or until golden and crunchy on the outside. (image 16)
FAQ’s
Yes, but the flavour won’t be quite the same. You can substitute with fresh garlic slices, but roasted garlic or confit really adds that sweet, mellow depth. You can also leave the garlic out entirely if it’s not your thing!
Let it rise for at least 8 hours or a maximum of 72 hours covered well and in the fridge. This slow fermentation develops flavour and gives the focaccia its airy, bubbly texture.
You can, but fresh rosemary is highly recommended for its aroma and texture. If using dried, reduce the amount as it’s more concentrated.
Make sure to generously coat your baking pan with olive oil. This not only prevents sticking but also helps create that signature crispy crust. You can also line your baking tray with baking paper. Don’t worry! This won’t impace the crispy bottom at all.
Serve
This garlic and rosemary no knead focaccia is best served warm, straight from the oven when the cheese is gooey and the crust is golden and crisp. Tear it apart and enjoy on its own, or serve it alongside one pan creamy orzo with burrata, perfect for soaking up the broth from Italian Mussels with Tomato and Chilli, or served with a big bowl of creamy garlic confit dip. You can even slice it up and use it to make one of my beloved Italian Sandwiches using my no-knead focaccia dough.
Store
To store, let the focaccia cool completely before wrapping it tightly in foil or placing it in an airtight container. It will keep well at room temperature for up to 2 days or in the fridge for up to 5. To reheat, pop slices into the air fryer at 160°C for about 3–5 minutes until warmed through and crispy. In the oven, place the focaccia on a tray and reheat at 180°C for 8–10 minutes. For a quick option, you can also toast slices in the toaster — just be sure the cheese is set and won’t melt into the toaster slots!
Focaccia recipes you will love

Focaccia
Cinnamon Scroll Sweet Focaccia
Focaccia
Cheesy Sesame Seed Focaccia
Focaccia
Olive no-knead Focaccia
Focaccia
Mini No Knead Focaccia
Have questions or want to leave a review about this No Knead Focaccia? Please do so below the recipe card! I always love answering your questions and hearing your feedback.
If you make this recipe, please follow me and tag me on Instagram, Tik Tok, or Pinterest so I can see your wonderful creations!

Garlic & Rosemary No Knead Focaccia
Ingredients
Garlic Confit
- 2 bulbs garlic
- 1 cup olive oil, extra virgin
Focaccia
- 700 g bread flour
- 680 g lukewarm water, (100°F / 34°C) – 95% hydration
- 7 g dry yeast
- 12 g fine sea salt
- 1 tsp honey
- 60 g olive oil, extra virgin
- 12 garlic confit cloves
- 1 tbsp rosemary, finely chopped
- 1 tsp flakey sea salt
Instructions
Garlic Confit
- Preheat: Preheat the oven to 120°C / 250°F
- Peel garlic: Peel the garlic by breaking the cloves away and placing them into a heatproof bowl. Submerge in boiling hot water for 5 minutes and drain. The skin will become loose and easy to peel away.
- Bake: Place the garlic cloves into an ovenproof dish and fully submerge in olive oil. It's important the garlic is fully submerged in the olive oil so it does not burn. Bake for 1 – 2 hours or until the garlic has become golden and is soft to touch. Allow the garlic confit to cool and seperate the garlic cloves from the oil. Use the oil to make the focaccia.
Focaccia dough
- Activate yeast: Stir water, yeast, and honey in a medium bowl with a whisk. Wait for about 5 minutes until the mixture becomes frothy, signalling that the yeast is ready.
- Dry ingredients: In a different large bowl, whisk flour and salt. Then, pour in the yeast mixture, stirring with a spoon or your hands to form a wet, sticky dough without dry spots. Cover the bowl with plastic or a damp cloth for 10 minutes.
- Stretch and fold: Afterward, with damp hands, stretch a piece of the dough and fold it across itself. Turn the bowl and repeat this action three more times, covering the dough again for another 10 minutes. This is the stretch and fold method and it will strengthen your dough. On the final stretch and fold, continue until the dough shapes into a ball.
- 1st proof: Coat a new bowl with 20g of olive oil, place the dough inside, and cover it tightly with plastic. Let it rest in the fridge between 12 to 72 hours; this is the first proof. We only need half of the dough for this recipe so slice the dough in half and use the second half for a different recipe.
- 2nd proof: Oil a baking tin with another 20g of olive oil. Move the dough there, gently stretching it to a rough rectangle, but not to the tin's edges—it will spread as it rises. Protect it with a damp cloth and let it rise for 2 hours in a warm spot.
- Preheat oven: Preheat your oven to 200°C (390°F).
- Toppings: After the rise, dimple the dough with your fingers. Scatter the rosemary, garlic confit and salt all over. Drizzle over the remaining olive oil.
- Bake & rest: Bake for 30 minutes until golden on top. Allow the focaccia to cool slightly before transferring it to a wire rack to rest for 15 minutes. Slice into it and serve immediately.
Video
Notes
- Yeast: I like to use dry yeast that needs to be activated in water however, you can use instant yeast if you prefer. There is no need to activate instant yeast so simply add it to the dry ingredients along with the water and honey.
- Flour: If you don’t have bread flour, all purpose flour will also work.
Nutrition
Nutrition information is automatically calculated, so should only be used as an approximation.
 Like this? Leave a comment below!
This was absolutely delectable!! Will definitely be made many more times. 🙂
I’m so glad you liked it! Thank you for the lovely comment.
Can I use whole wheat flour instead of all purpose flour?
I haven’t tried that before but I think it could work! Let me know how you go!
May i use gluten free all purpose flour??
I think the cooking times will change with GF flour. I have had a lot of requests for a GF version so I will get working on a recipe!
Will a glass baking pan work?
It should do! Let me know how you go.
Yes, I used the glass rectangular lasagna dish and it works fine!
I also did, first time it attached to the glass badly and kind of ruined it. Then I tried with parchment which was lovely but it absorbed some of the moisture. The final and best try was with butter greased pan. Easy release!
oh no! That has happened to me before with certain types of baking dishes. I always oil my pan very well and I have found the best one to use is a non stick baking tray.
Hi
Any chance you could share the weight of flour rather than cup measures?
Thanks!
Scratch that you have – face palm!
Hi,
After adding the ingredients together, my dough is super wet and there is no way i can stretch and fold. Would you have any idea where i went wrong?
Thank you!
The dough is very hydrated yet you should still be able to stretch and fold it after a 10 minute rest! Did you measure out your ingredients?
Hi! I followed your recipe and the dough is rising for the second time right now, I can’t wait to taste it! I was just wondering how long and how you can store the baked focaccia. And if you want to use it the next day or after, would you put it back into the oven for a bit? Thanks in advance and thanks for the recipe!
The bread is definitely the best when eaten on the day it’s made however, there are a few options to maintain its freshness. You can slice it up and freeze it on the day it’s made and simply defrost it when ready to serve. I would also lightly toast it in the taoster or with a drizzle of olive oil on a pan. You can also store it in a bread bin or wrap it in plastic wrap and leave on your bench for up to 3 days. It wont be as fresh or nice as the day its baked but it would also be lovely slightly toasted. I hope that helps!
I throw my left over pieces in the air fryer for a couple minutes. 🙂
An amazing recipe! Thanks so much! I saw your sandwich video, and was inspired to “properly” cook for the first time in AGES. I can’t wait to feed my family and friends this amazing sandwich for lunch today 🙂 Bread is on second rise now.
I am so glad you like it! i hope you all enjoy your sandwich lunch!
This was absolutely amazing! Making the confit and bread was actually really simple and it was so delicious. Everyone loved the bread and it was fun to make! Will be trying more recipes from you, no doubt.
CH
I’m so happy to hear that! Thank you for the lovely feedback.
Hi my ovens lowest temp is 170? Should adjust the time the garlic confit bakes?
Hello! It sounds like this may be for fahrenheit. I have listed the oven temperature in Celsius. If your oven doesn’t go any lower than 170 degrees celsius, you can cook the garlic on the stovetop on a very low heat for the same amount of time.
Hello there! Let me start off by saying I’m not a fan of baking because of the preciseness it calls for; however, your tik tok video won me over and gave me the courage! I made this my weekend project and it is everything I hoped for!
Thank you for providing such great easy to follow instructions!
Thank you so much for the lovely feedback!
Is there anyway to speed up the rising process? I’m very impatient 😂
You can do it in a shorter time but for the best result I recommend leaving the dough to rise for as long as possible.